Skip to main content Skip to navigation
Washington State University News

Branding Update

We have a new name and logo! Formerly known as WSU Aerospace Club, our new name is: Palouse Aerospace. A lot of time and thinking went into this, so to explain we hope to grow and expand our club in the future, and this is one small tool to help make that happen!

Our new logo is a head of wheat going supersonic.


Model-Based Design for UAV Propulsion System Utilizing 1kW Hydrogen Fuel Cell

Executive Summary
An innovative design in aircraft propulsion for Unmanned Aircraft Vehicles (UAV)
application using hydrogen fuel. Hydrogen fuel technology can assist in the effort of
decarbonization of the world’s economy. Team Oculus partnered with Washington State
University (WSU) Aerospace Club and Senior Mechanical Engineering Capstone to help
address Amazon’s efforts in reducing their carbon footprint and the need for a longendurance electric flight. Oculus designed a working model in MATLAB Simulink that
exhibits the behavior of the hydrogen fuel cell power system. The model can be
configured to fit required specifications and determine whether the power applied is
suitable to the load.

Introduction
The electric rotorcraft delivery industry is at a tipping point. Amazon relies heavily on
shipping packages across the world, and one of their forms of delivery is the electric
rotorcraft, also commonly known as a drone. Amazon has recently completed tests of
package delivery using conventional LIPO battery powered drones. Hydrogen fuel has a
very high specific energy, which can extend the flight duration approximately 3-5 times
over regular LIPO battery powered drones on the market. This pairing of hydrogen and
drones with Amazon is deliberate as Amazon already maintains liquid hydrogen storage
capabilities at most fulfillment centers to tend hydrogen fuel cell forklift fleets. Oculus’s
goal for this project is to model a hydrogen fueled drone that can be configurable for
Amazon and other companies that are moving towards hydrogen fueled technology.

Description of Culminating Design
Oculus has developed a model in Simulink to create the power flow of the propulsion
system and to determine the suitability and sustainability of the 1kW fuel cell for
powering the drone. The input model is constructed using a triple hybrid power system,
and consist of the following: hydrogen fuel cell, a LIPO 6s battery and a supercapacitor.
Voltage regulators are connected to both the fuel cell and the supercapacitor to
automatically maintain constant voltage output. The fuel cell will produce a constant and
steady source of power to the load while in flight. The 6s LIPO battery will produce the
instantaneous power needed to create the thrust for the drone’s initial take-off. The
supercapacitor can produce additional instantaneous power and absorb majority of the
load stress.


Figure 1. Propulsion System Block Diagram

Buck Converter
Due to the fuel cell having a much higher voltage than the battery, a buck
converter design (figure 3) was chosen as a step-down unidirectional DC/DC
converter. Buck converter is a class of Switch Mode Power Supply (SMPS) and
could potentially provide a vastly high-power efficiency (90%) [1].


Figure 2. Buck Converter Block Diagram


Figure 3. Buck Converter Simulink model Diagram

An IGBT transistor was chosen as a switch for the circuit due to its ability to
handle high current, and high power [2]. When the switch is on, the power supply
will connect to the inductor and the diode becomes an open circuit. Where ton
represents the time the switch is on, T = ton = + toff and D is the duty cycle as
D =ton/T. When the switch is off, the voltage across the diode will drop to zero,
the diode shunts the connection between the inductor and ground.
This led to two possible operating modes for the buck converter: continuous
mode and discontinuous mode. The continuous mode shows the behavior of the
circuit during the off state as it falls and during the on state as it rises. The output
voltage can be calculated by using the equation 1,

Vout = D * Vin (eq1)

Where D represents the duty cycle. By controlling the duty cycle, the reference
output voltage can be easily configured with a PID controller. However, during a
discontinuous mode, the behavior gets more complicated.
During the discontinuous mode, it common for a DC/DC converter to have its
inductor current fall to zero. The inductor current will not persistent enough and
will fall to zero before completing the cycle. When the peak inductor current
become less than the DC component, the diode turns on while the switch is off. If
the peak of the inductor current is bigger than the DC component, the current will
fall to zero while the diode is conducting, and the inductor current will remain
zero until the switch is back on again. This condition often happens during the
light-load condition, such as the moment before lift-off.
To control the frequency and duty cycle of the buck converter, Oculus has
designed a simple PID controller (figure 9). The PID will monitor the overall
6
voltage across all three power components and automatically regulate the
frequency to maintain and stabilize voltage levels across the system. The PID
controller regulating the voltages will prevent damage to the fuel cell and the
battery. The transfer function of the buck converter controller was calculated and
used to assist the PID.

Buck Boost Converter

To improve the power density of the drone’s power system, Oculus theorized that
the addition of a supercapacitor in parallel with the lipo-battery would reduce the
amount of power the motors drain from the battery. The main function of a
capacitor is to store electrical energy and then discharge the energy into to the
circuit when necessary. A supercapacitor is a high-capacity capacitor and could
potentially store roughly 10 to 100 times more energy per unit volume or mass
than the typical electrolytic capacitors [3]. The supercapacitor will accumulate the  output energy from the lipo-battery and store
it until the system communicates to the supercapacitor to discharge the energy.
To maintain the flow of energy being stored and discharged from the
supercapacitor, Oculus decided to create a buck-boost converter to act as a
switch for the supercapacitor to the battery. A buck-boost converter is a
bidirectional DC to DC converter. A bidirectional DC to DC converter allows the
flow of power to go in both directions, which means the circuit can feed power to
the load and the load can feed the power back to the source.


Figure 4. Buck-Boost Converter Block Diagram


Figure 5. Buck-Boost Simulink model Diagram

Due to three additional transistors, the circuit required a more complex controller
compared to the previous design. The circuit operates on three different modes
with four different switching states (figure 6).


Figure 6. Switching states of the buck-boost converter


Oculus has developed a controller that can be used to control the circuit. The
mode selection circuit is a state machine that would detect the output voltage and
decide which operation mode the circuit will run on by comparing it with the
reference voltage of 22.5


Figure 7. Control System of the Triple Hybrid Power System


Figure 8. Selection mode


Figure 9. PID Controller

DC-AC inverter and Motor:
The nominal output for the hydrogen fuel cell drone power system should have a
stator and rotor current of 8A, a rotor speed of 1438 rpm, and an electromagnetic
torque of 1 N*m. To achieve the most efficient system, team Oculus decided to
use an AC synchronous motor. The AC synchronous motor feeds 22.5Vac of
voltage created by the DC to AC full bridge inverter, which is commonly known
as the Electrical Speed Controller (ESC) in the physical drone application. The
DC to AC inverter requires 22.5Vdc of voltage and converts to a three-phase
voltage of 22.5Vac. The inverter uses a converter to stabilize the voltage level
and is made with 6 PWM controlled diodes. The model in Simulink uses an IGBT
as diode and can be controlled with a PWM controller [4]. A PWM controller is a
pulse signal with a constant phase shift that includes 6 diodes controlled by 6
shifted pulse signals. Six diodes act as the switches by controlling the on and off
states. The output voltage frequency can also be controlled [5]. In a physical
drone application, an ESC can turn PWM controller automatically, hence, in
Simulink, team Oculus uses an open loop circuit instead of close loop circuit,
which can make a cleaner signal. The DC-AC inverter modeling is shown in Fig
10.


Figure 10. DC-AC inverter modeling
An AC synchronous motor is shown in fig 11, it is fed by a 3-phase voltage of
22.5Vac. A resistor in series is added to the transmission line to protect the motor
10
from burning out. By finding the correct motor parameters, team Oculus can turn
each motor parameter by experiment. For voltages under 22.5Vac or greater
than 22.5Vac, the motor will not work.


Figure 11. AC Asynchronous Motor Modeling


 DC Motor Modeling

To modeling a DC motor. The rotor and shaft are assumed to be rigid. Here is the physical circuit of a DC motor.


Addition information about DC motor can be found here 


Analysis, Modeling and Simulation Results, Beta Prototype Test Results:

Power System


Figure 12 . Voltage level across the system.


Using the reading in figure 13 , it has indicated that the overall system has achieved the main purpose, having an overall voltage around 22.5V. The buck converter has managed to step down the input from the fuel cell at 48V to 22.58V, which is within the 0.35% of the desired voltage level.

The buck boost converter has an average output voltage at 22.5V (figure 13) with 0-25V input from the supercapacitor, however, it is still very unstable due to out of tune PID controller.

The battery voltage level maintains around 22.5V, which is the desired voltage level.


Figure 13. The Voltage reading of buck boost converter


AC Motor

The results showed that each designed circuit and block achieved team purpose. The buck converter and buck-boost converter are working functionally, and the PWM for each converter successfully receives a signal and automatically controls the converter’s mode. At this point, the voltage output of triple hybrid system can be stabilized to a voltage of 22.5Vdc. For the simulation results, team Oculus decided to monitor the stator current and rotor current to  protect the motor from burning out. Moreover, the rotor speed and electromagnetic torque are two factors that reflect the motor performance. According to [6], current in stator and rotor are ideally a sine wave because of AC motor. In addition, the initial condition of an AC motor running at a constant rotor speed is specifically 1500 rpm with a no load condition (figure 15). When a load has been added, the rotor shaft starts cracking and the rotor speed must drop to go back to steady state. The final rotor speed has to be smaller than the no load speed condition. The load torque applied to the machine’s shaft is constant and is set to the nominal value of 1 N*m. The value of the machine’s shaft nominal value would be considered small because it’s easy to analyze the motor at a small value to avoid an output signal with an excess amount of noise. Simulation results are shown in the figures below.


Fig 14. Rotor current (top) and stator current (bottom) of AC motor (A).  


Fig 15. Rotor speed of AC motor (RPM)


Fig 16. Electromagnetic torque of AC motor (N*m)


DC Motor

Result can be found here 


Beta Prototype Validation Results

Using the scope feature within Simulink, Oculus confirmed the overall output voltage to be  22.5V. The voltage of 22.5V is defined as the desired voltage level, in order to match the design from Protonex. The buck converter is connected to the fuel cell to step down the voltage and  match the battery voltage. The two components will then in turn charge the supercapacitor. When the voltage of supercapacitor is greater than the overall voltage, the designed 4-switch buck-boost converter will then successfully step down the voltage using the buck mode of the buck-boost converter, with the help of  a PID controller. Pertaining to the output of the buck-boost converter, if the battery voltage is less than the voltage of supercapacitor, boost mode of the buck-boost converter will step up the voltage. The desired voltage at 22.5Vdc of the hybrid system output is the one factor to validate the system results.

As the report mentioned, the stator current and rotor current have to be a sine wave because of AC motor, and the zero to peak current for both stator and rotor current are 7.4Aac (figure 14). In a physical application, the team could choose a motor of rated current greater than 7.4Aac without risking a burn-out of the motors. A motor running at an initial condition of 1500 rpm, when adding a load, results in a rotor speed drop to 1437 rpm (figure 15). As the report indicated before, a no load rotor speed should be the maximum case. The nominal value of torque is 1 N*m (figure 16), the simulation results match the nominal torque. The Beta prototype simulation results have been validated and accepted.

Broader Impacts and Contemporary Issues

Around the global countries are trying to reduce their carbon footprint. There has been increasing efforts in finding alternative power sources for all types of vehicles, whether they’re travelling by road, sea or air. The most common of alternative power sources would be that of solar and electrical power. However, researchers from different companies and universities have put money and time into researching the benefits of having hydrogen fuel as a power source.

According to the National Public Relations news website [7], Japan is embracing the technology of hydrogen fuel, and aims to create the first “hydrogen society”. The article gives insight into the auto companies in Japan that have plans to have 40,000 fuel cell electric vehicles on the road, with a longer-term goal of 200,000 such vehicles in the next six years.

Amazon aims to cut shipment carbon footprint in half by 2030, according to The Hill, a US political website. Amazon relies heavily on shipping packages across the globe, and ultimately aims to make all shipments carbon neutral. Amazon’s current plan to meet the carbon neutral goal, is by utilizing electric vans, using renewable energy sources such as solar power, and pushing more retailers to reuse packaging. They also hope the rise of aircraft biofuels will help aid in their plans.

Our plans for our liquid hydrogen fuel-cell-powered electric rotorcraft, will help Amazon in their goal to reduce their carbon footprint. Our power system for the electric rotorcraft is designed to extend the duration of flight to roughly 4 hours. In the event that we are successful in our design, Amazon can implement it to their future electric rotorcrafts, and be able to deliver packages to customers in a larger radius while reducing their carbon footprint.

According to the World Energy Council [8], decarbonization of energy usage is one of the biggest challenges facing industries globally. The report explains how the development of -based production and production processes in the industry can serve as a catalyst to substantial decarbonization of the economy as a whole.


Ethical Issues Affiliated with this Design

Over the past few years, surveillance drones have raised a lot of issues regarding privacy and civil liberties. Drones with advanced surveillance equipment are already in service by several law enforcement agencies to carry various activities such as live feed camera, thermal imaging to monitor US citizens. Several organizations such as the ACLU has done a lot of studies and concluded that addition laws are required to protect the citizen against unwarranted ariel surveillance. The current laws are not strong enough to ensure the technology will be used responsibly and consistently with our democratic values. In return, FAA approved new laws that would make the use of drone much easier for law enforcement agencies.  Fortunately, most of those drones, with the exception of fixed-wing UAVs, operated by the military, have limited flight time duration and can only fly for roughly 20 minutes at a time. Thus prevents agencies from overusing it to monitor the citizen, and forces them to use it only when necessary. Oculus’s new propulsion design could effectively change that. Using hydrogen fuel, the surveillance capability of law enforcement could increase significantly. This might lead to police agencies abuse the technology and violate the privacy of the citizen.


Engineering Economic Analysis

The aerospace sector is heavily regulated in the United States and internationally due to security and potential safety concerns. All commercial and military aircraft must be certified as compliant to relevant safety standards by regulation body before it can fly [9]. Each electronic and electrical system design is to be verified, and physical testing is to be performed on the actual components. System output is also expected to be reviewed for the maintenance of traceability. Designs will undergo version control for all iterations and processes. Such required compliance often significantly increases the projected cost, leading to delays in production. To help minimize cost, aerospace companies often rely on model-based design. By streamlining these processes, defects can be detected during the development process, thereby preventing significantly rework and redocumentation. One of the most popular model-based design tools is Simulink. It is often considered to be the best design environment for complicated systems, and as such widely used by the aerospace sector [9]. Oculus’s design is capable of being used by researchers towards hydrogen fuel cell applications, by companies such as Protonix helping to further development of the Hydrogen fuel cell system, or amazon, providing them with a new case-study alternative propulsion system for their delivery drones. Future engineering and researching teams will be able to share their models with others in a format which facilitates the meeting of complex requirements, thus prevent additional research and development costs.

Limitations and Recommendations

Oculus still has limitations that could be improve by future teams. The first limitation would be due to the lack of computing capability of each members’ computer systems. The buck-boost converter contains a closed loop PID controller that ran multiple different PWM signals simultaneously at a frequency of 60kHz. For 1 second of simulation, it took between 2 to 3.5 hours in real time for Oculus’ s computers to run all the necessary computations, and 2 seconds of simulations is required to predict the system behavior. Thus, Oculus was unable to stabilize the buck-boost circuit. Fortunately, when running all three components in parallel, the entire system was able to stabilize the overall voltage, but the slow computation time is still an issue. The complete Beta Prototype needs to be running separately to provide the audience with a complete picture of the model.

The first part of the prototype is the triple hybrid power system and the second part is the DC-AC inverter, DC motor, and AC motor. To connect first part with the second part, the first part needs to achieve an output voltage of 22.5Vdc, and from there, team Oculus can use the 22.5Vdc output as a source input for part 2. Team Oculus can successfully run the simulation model in Simulink. The PID controller is not easy to turn, team Oculus spent lot of time turning parameters of PID controller. To stabilize the output torque, current and rotor speed, they had to find the correct parameters of the motor and those parameters depended on the system load, input voltage, an input torque. Team Oculus suggested that finding the desired motor for the system was required, and once the motor had been chosen, the RLC values of the motor could be determined in Simulink. Adding the PID controller to the AC motor allowed team Oculus to only consider changing the PID value, because the RLC values were fixed. Oculus recommends using a computer with additional computational RAM.

Conclusions and Future Work

In conclusion, the power system works as intended with the overall voltage across each component hovering around 22.5V. The system is still not completely stable, due to the limitation of available computational RAM. If provided better computers, Oculus would have been able to tune up the PID controllers and stabilized the system.

Comparing DC and AC motor behaviors, it was obvious that the DC motor needed more current to initiate the start of the load, which indicates that a larger sized motor was needed. The current of AC motor is 8A which is more acceptable, and with the same input voltage of 22.5Vdc an AC motor can run faster and more efficient.

For the future work of Oculus’s model, there is still work to be done to tuned up and further the stabilization of the entire system, and a physical testbench will be needed to be built for additional research. Oculus has already purchase and acquired several physical components such as a battery, motors, ESCs, a buck converter, a buck boost converter and a controller for the buck-boost converter. With doing more research, the possibility of parameter matching of DC and AC motors will increase, which will result in the RLC values of two motors to be the same. In addition, the DC-AC inverter can apply close loop application if needed.


Acknowledgement

Team Oculus would like to extend its deepest thanks to mentors Dr. Jacob Leachman, Dr. Colin Merriman, and members from the Hyper Lab for the guidance provided throughout the design process.


References

[1] S. A. Lopa, S. Hossain, M. K. Hasan, and T. K. Chakraborty, “Design and Simulation of DC-DC Converters – irjet.net.” [Online]. Available: https://www.irjet.net/archives/V3/i1/IRJET-V3I111.pdf. [Accessed: 16-Apr-2019].

[2] A. S. Martyanov, D. V. Korobatov, and E. V. Solomin, “Research of IGBT-transistor in pulse switch,” 2016 2nd International Conference on Industrial Engineering, Applications and Manufacturing (ICIEAM), 2016.

[3] W. Raza, F. Ali, N. Raza, Y. Luo, K.-H. Kim, J. Yang, and S. Kumar, “Recent advancements in supercapacitor technology,” Research Gate. Available: https://www.researchgate.net/publication/326929552_Recent_Advancements_in_Supercapacitor_Technology/download

[4] R. E. Turkington, “Analysis of 3-phase inverter with resistive load,” Electrical Engineering, vol. 70, no. 12, pp. 1076–1076, 1951.

[5] PULSE WIDTH MODULATED INVERTER. [Online]. Available: https://www.ewh.ieee.org/soc/es/Nov1998/08/PWMINV.HTM

[6] Y. Gong, “Modeling and simulation of asynchronous motor based on MATLAB/Simulink,” 2011 International Conference on Electrical and Control Engineering, 2011.

[7] S. Phillips, “Japan Is Betting Big on the Future of Hydrogen Cars,” NPR, 18-Mar-2019. [Online]. Available: https://www.npr.org/2019/03/18/700877189/japan-is-betting-big-on-the-future-of-hydrogen-cars?fbclid=IwAR2ZiwPprMsNZGjKeeUn7CLFwHJaTIPOEMMkF8Ro1FqzPaf0icP2QYpIzZo. [Accessed: 17-Apr-2019].

[8] J. Owen-Jones, “The World Energy Council publishes hydrogen report,” Gas World, Feb. 2019

[9] “Model-based design facilitates compliance to aerospace standards,” Military & Aerospace      Electronics, 01-Mar-2010. [Online]. Available: https://www.militaryaerospace.com/articles/print/volume-21/issue-3/departments/opinion/model-based-design-facilitates-compliance-to-aerospace-standards.html. [Accessed: 17-Apr-2019].


 Summary of Agile and Waterfall Design Activities

There were two types of software development methodologies that team Oculus conducted. The methodologies were Agile Sprint and Waterfall Development. An Agile Sprint is defined as a short, time-boxed period when a team of people address complex adaptive problems to a specified framework. A Waterfall design is based on the principles of strict work organization and sequential stages. Both methodologies are effective.

Oculus set a 2-week time frame for their Agile Sprint. Day 1 & 2, Oculus appointed an Agile Sprint historian, defined their goal, appointed a Decider, clarified the Users & Stakeholders, clarified what the Users & Stakeholders wanted, and coordinated benchmarking sessions with experts in person and used articles for information. Day 3 & 4, Oculus made a list of possible subsystems that would be involved in their overall system, and individually tried to figure out problems and solution with each subsystem they listed. Day 5 & 6 consisted of reviewing each individual problem and solution design and voting for what they deemed to be the best solution to the problem. Once a workable solution was agreed upon, day 7 & 8 consisted of the team making a block diagram of the solution. Day 9 & 10, Oculus informed their client of all the things discussed in the sprint, and then took that information with the client’s feedback to create a cover letter for their professor, Dr. Pedrow. Day 9 & 10 concluded the team’s whole Agile Sprint process.

The designs discussed during the Agile Sprint were evaluated using Waterfall methods which included using a screening matrix to help the team choose the best concept. Oculus’s Waterfall development continued the Agile Sprint’s workable solution set defined by the team and worked towards building a workable model. In the beginning stages of Waterfall development, Oculus was working on a physical model of their design, but then realized that they misidentified the scope of the project, and that the mistake set them a month behind schedule. Due to the fact that they made a mistake, Oculus didn’t do too well on the Waterfall report and were on the verge of not being able to finish the Alpha Prototype in a timely manner. Another issue that Oculus came across in the Waterfall Development stage, was that they lost a member. Despite some severe setbacks, the ideas found during the Waterfall activities proved to be suitable for the Alpha Prototype and team Oculus was able to finish and present their findings. Oculus achieved the result of a successful Alpha Prototype by effectively communicating with each other and determining that building a Simulink model of a triple hybrid power system between a fuel cell, a battery and a supercapacitor was better suited for the time constraint. The idea of building a Simulink model of the triple hybrid system had proven to be effective in providing enough power for the drone and increasing the power density. By using the agile design concept of failing fast, Oculus had come up with a variety of concepts, and quickly found the most viable design.


Direction for Spaceport America Cup 2019

Noah Thompson, Rocket Team Lead

Matthew Dickson, Control System Electronics Lead

Current Air Brake Design Prototype 

INTRODUCTION

In order to align objectives with the current aerospace industry and establish WSU as a contender on the world intercollegiate rocketry stage, the aerospace club is developing custom simulations and control systems for complex aerodynamic surfaces. The team’s initial design for submission to Spaceport America Cup 2019 included two payloads: a Doppler effect based velocity measurement and an egg. The club has now replaced the doppler payload with an active air brake. The original payloads were auxiliary to the primary goal of the submission, which was to serve as a test platform for the future development of aforementioned control systems. This lead to resources being removed from the original goal of the rocket. In late January the decision was made to remove the placeholder payloads, instead pursuing a simple active braking surface directly. Given a time of only five weeks to produce a functioning prototype for test launch, the group determined that use of an airbrake on this year’s rocket would only be during ascent. The P.I.D. and simulation platform developed for this system will directly apply to later, more ambitious endeavors. With the use of such control surfaces, the club can obtain a level of trajectory control unattainable through other means.

INITIAL DESIGN

This system was considered to contain primarily only an electrical and mechanical system. The physical structure of the rocket increase (an inherent requirement of the technology’s function). The mechanical components selected also were evaluated on their relative response time, as fast adjustments will need to be made during flight. Lastly, each proposed design’s significance with regard to the current state of astronautical engineering was considered as well. The proposed designs are illustrated in Figure 1.

Figure 1. Considered Air-Brake Design

A weighted case study was performed, comparing each design on the criteria of mechanical simplicity, electrical simplicity, drag capabilities (ability to significantly effect overall drag), Cost, Response, and Engineering Significance (how impressive is it?). Simplicity was weighted heavily due to the time constraints. This study is summarized in the Table 1.

Table 1 – Qualitative trade study of air brake designs.

Air Brake Trade Study
Criteria Weighting #1 #2 #3 #5
Mech. Simplicity 0.3 8 5 6 9
Electr. Simplicity 0.3 7 7 6 9
Drag Ability 0.1 10 10 2 2
Cost 0.1 3 4 4 7
Response Speed 0.1 9 4 8 10
Relevance 0.1 8 6 2 2
TOTALS 7.5 6 5.8 8.1

Ultimately design five, the rotating fin section brake scored the highest in the trade study for its simplicity. However, due to its very low hypothesized drag ability, more in depth analysis of the design was performed.

Two SolidWorks flow studies of design five, one with holes open and one with holes closed, was performed. The total force against flow only increased 3N (from 230N to 233N). These preliminary findings suggest that such a drag modification device might not be significant enough for our purposes. The more traditional air brake was chosen.

Figure 2. Rough conceptual model of design #5, ring air brake

The air brake will be designed to be so electrically and mechanically simple as possible. Almost all internal structures related to it are designed to be cut in two dimensions using a water jet (or a laser cutter for the wooden test rocket components), thus minimizing manufacturing cost and time to production. The mechanism is designed such that a single linear actuator or large servo could engage all brakes by pushing on a single platform.


Figure 3. Base model of design #1, unoptimized, configured for test rocket. Left shown closed, right shown open


Final design and optimization for test rocket will occur from February 15th to 22nd, in tandem with test rocket primary structures fabrication and implementation of control schemes on stationary test bed.


The test rocket will have the centering rings cut from sheet metal, the center platform and linkages 3D printed with solid infill, and the fin supports will be wooden. On the spaceport model, the entirety of the structure will likely be either composite or metal, with the center structure being the only machined component.


POSSIBLE CONTROL METHODS

The design shown in this document is mostly conceptual (not yet having been optimized). The model shown is designed for a test rocket, flying to an apogee of only 100ft and meeting FAR 101 regulations. This rocket is intended for repeated launch on private land outside pullman, clear of restricted airspace. The data collected in this set of launches will be used to compare four primary frameworks for airbrake control, and two logical methods for approaching onboard data processing. The team’s goal is to minimize the amount of time necessary to run one computational cycle while maximizing altitude control accuracy. These combinations are listed below. Test rocket systems will be run off of a Teensy 3.6.


Frameworks:

“Bang-Bang” ControllerSystem has binary states. In the case of the airbrake, if overshoot is detected the brake will extend fully.


P-ControllerSystem state depends on error. The larger the error, the stronger the corrective action.


PI-ControllerSystem state depends on error and duration of error. The larger the error, the stronger the corrective action. In addition, if the error is too small for corrective action but is sustained, proportional corrective action will take place.


PID-ControllerSystem state depends on error, duration of error, and change in error. The larger the error, the stronger the corrective action. Small but sustained error will also result in a proportional corrective action. In addition, corrective action will be taken proportional to the current change in error.


Logical Methods:

Acceleration to AccelerationThe movement of the air brake is determined only by a direction and proximity to desired acceleration. The control system operates only based on acceleration response to movement, without prior knowledge of expected drag.


Acceleration to Brake PositionDesired brake position is determined as a function of needed acceleration to reach apogee. This function is created using the linear interpolation of a two dimensional coefficient of drag matrix. This dataset is generated in terms of velocity and brake position, but reparametrized in terms of average acceleration at a point.


BUDGET & TIMELINE

There is very little time to accomplish this goal, and so a strict timeline will be adhered to.

A test rocket will begin launching the weekend of March 9th, weather allowing. Design of the test rocket concludes on February 16th, with construction beginning that same weekend. The base code for the test rocket will be completed prior to the end of February. Ordering of materials for spaceport rocket fabrication will be completed upon approval, with construction beginning as soon as they arrive. The club’s updated layup technique sacrifices a small amount of weight and strength in exchange for dramatically faster turnaround and low rejection rate as compared to previous years. All rocket body tubes (and extras) should be completed within a week of construction beginning.

The full rocket will be completed in time for full scale test launch in late April, the weekend before finals. If less than three club members can be found to attend this launch, it will be postponed until late May.

4 Switches Buck boost converter

Design and Justification

The buck-boost circuit that was used during the alpha prototype was the most simplistic topology involving just one-switch in the buck-boost converter. Based on a published paper by the Department of Electrical and Electronics Engineering SSN College of Engineering [1], the one switch steps up/steps down the converter that we uses has a relatively high voltage and current stress on components overtime compare to the buck or boost converter. By using different topologies with more than 1 transistor, the efficiency of the converter could be significantly increased to over 90%. Oculus has chose a new 4-switches mode selection buck-boost converter (figure 1).

Figure 1. 4 switches buck boost converter


Due to having 3 extra transistors, the circuit requires a more complicated controller compare to the previous design. The circuit operates on 3 different modes with 4 different switching states (Figure 2).

Figure 2. Switching states of the Buck boost converter

Oculus has developed a controller that could be used to control the circuit. The mode selection circuit is a state machine that would detect the output voltage, and decide which operation mode the circuit will run on by comparing it with the reference voltage (22.5V).

Figure 3. The control system


Figure 4. Selection mode

Figure 5 & 6. PID control

Result

The new design buck-boost converter has shown a lot of promising results, between the first submission on March 1st to current date, Oculus has managed to have some significant progress. The problem with the control circuit earlier has been fixed and now it’s working and capable of producing clear signals (figure 7).

Figure 7. Buck mode, boost mode, and buck-boost mode control signals

The reference voltage was set to be at 22.5V (typical voltage for 6s battery system). Although the circuit itself has yet to be able to produce a clean and reliable waveform, it indicates the circuit work exactly how it was designed to be (figure 8). Based on the reading, the most logical reason for such signal has to be from out of tune PID control. Oculus believe once the PID has been tune up to match the circuit, the signal should be clean up and a stable output voltage will be produced


Figure 8. Output signal.


Figure 9 shows our model for the entire power system of the drone


UPDATE: Saturday Mar 16, 2019 . 4:08pm


Based on the signals (figure below), I have pinpoint where the bug might be. For some unknown reason, the PID control stopped working during the boost mode. I have some suspicious why this is happening and have a plan to tackle this. Right now I’m using 1 PID for everything, there is a possibility I have to build a dedicated control for each mode. Before I do anything, I would need to go back to my drawing board and recheck my  TF calculations.

UPDATE: Monday Mar 18, 2019 . 10:14pm

A PID control was replaced by a PI control. I rechecked my math (figure 11) and was able to determine the correct duty cycle and managed to clean up the signal noise. However I have yet to determine the cause of the bug shown in 2 figures below. I have determined it must be within the PI control itself


Figure 10a. Output signal on 3/16/19 & 3/18/19

Figure 11. Circuit analysis

UPDATE: Monday Mar 26, 2019 . 1:03 am:

One week has passed since the last update, the main culprit has been finally identified. After recheck and confirm my math and logic, it has been clear to me the problem must lie with Simulink itself. Having a PID control within multiple blocks has proved to be hard for Simulink to process, and thus fail to produce the intended signals. After multiple different design configurations, I have nailed down the one that would work with my model. Figure 12 below shows the control signals as intended and figure 13 shows the voltage output

Figure 12. Control signals

Figure 13. Output signal

Despite having a lot of noise and being very unstable, the signal has indicated that the output voltage hovers around 22.5V (Reference voltage). There are still a lot of work ahead to clear up the signal, but so far the output voltage looks very promising

Figure 14. New PI controller

Waterfall Report on Alpha Prototype Activities

Student Names: Casey Adam Doan, Shaynese Deas, Yuling Liu

Student Advisors: Jacob Leachman, Collin Merriman

Instructor: Patrick Pedrow

Date Submitted: 12-7-2018

Introduction

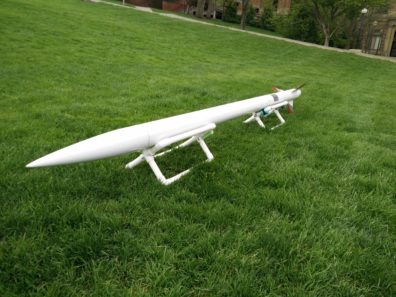
Electrical industrial rotorcraft delivery service is no longer pie in the sky. Amazon has recently completed tests on delivery packages using conventional LIPO battery powered drone. But due to the limitation of conventional batteries, almost all rotorcrafts suffer a limited flight time and can only operate for 15 to 45 minutes before the batteries requires to be recharge. Fuel cell and hydrogen fuel has been developed as a long-term alternative solution due to its specific high energy density. A hydrogen powered drones are approximated to have 3-5 times flight duration over regular LIPO battery powered drone in the market. This project is sponsored by Amazon as they already maintain liquid hydrogen storage capabilities at their facilities for their hydrogen powered fuel cell forklift fleets.


Background

A hydrogen fuel cell is a device that can generates electricity by a convert the potential energy of hydrogen into electricity. There are several different types of fuel cell out there in the market, but the most efficient and most popular fuel cell is a Proton Exchange Membrane (PEM) fuel cell. An entire PEM fuel cell system consists of multiple PEM cell in a stack. A fuel cell is consisted of a membrane, 2 sheets of catalyst, and  2 flow field plates. Hydrogen gas is channeled through a field flow plate and then got strip off its electron by the anode sheet. The membrane will only allows the proton of the hydrogen gas to pass through it. The electron must pass through a seperate circuit, which in turn create electricity. On another side, oxygen will come in and helps pull the proton through the membrane. The only bypass product will be water.

Oculus is in possession of a 6 years old HES H-1000 hydrogen PEM fuel cell that was left over from an old project of the Aerospace Club. The original H-1000 fuel cell was utilized and tested to determine the suitability for this application. After over 10 of hydration following a recommended procedure, it still took 3.5h to reach a peak the maximum power generation of 850W. Based on the old report from the team that was working with this fuel cell back in 2014, during peak performance, it had never exceeded 900W. After 2 phone calls with HES, the company that made the H-1000. it is highly unlikely the FC will ever reach 900W again. This posed a serious challenge for team Oculus because the mechanical team from the Aerospace club and ME 416 requested to have a power system that is capable to produce 1500W. Based on this information, team Oculus has advised the client to move on to a newer and more superior fuel cell FCair 1200 from another company named Protonex. Protonex Technology Corporation has agreed to loan the team their new FCair fuel cell. Their fuel cell has a rated of 1200W.

Another problem facing the team, despite having much higher energy density, hydrogen fuel has a much lower power density compared to regular LIPO. As a result, the fuel cell produces lower current than required to power the motors. On average, all eight motors will burst to around 80-90, and sometime would reach 250A during peak power. The dynamic of the fuel cell is just too slow to handle the sudden load change. To overcome this problem, another energy storage will need to be add to the entire system to help with load demand.

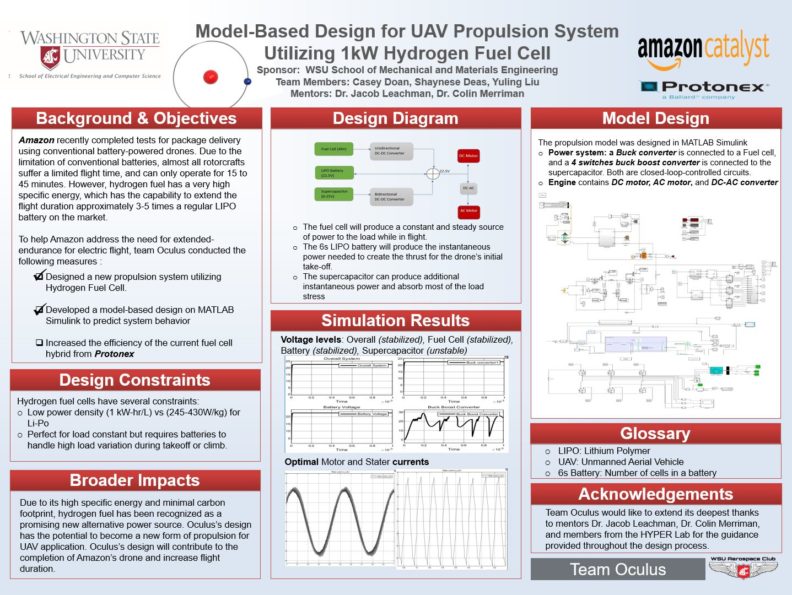
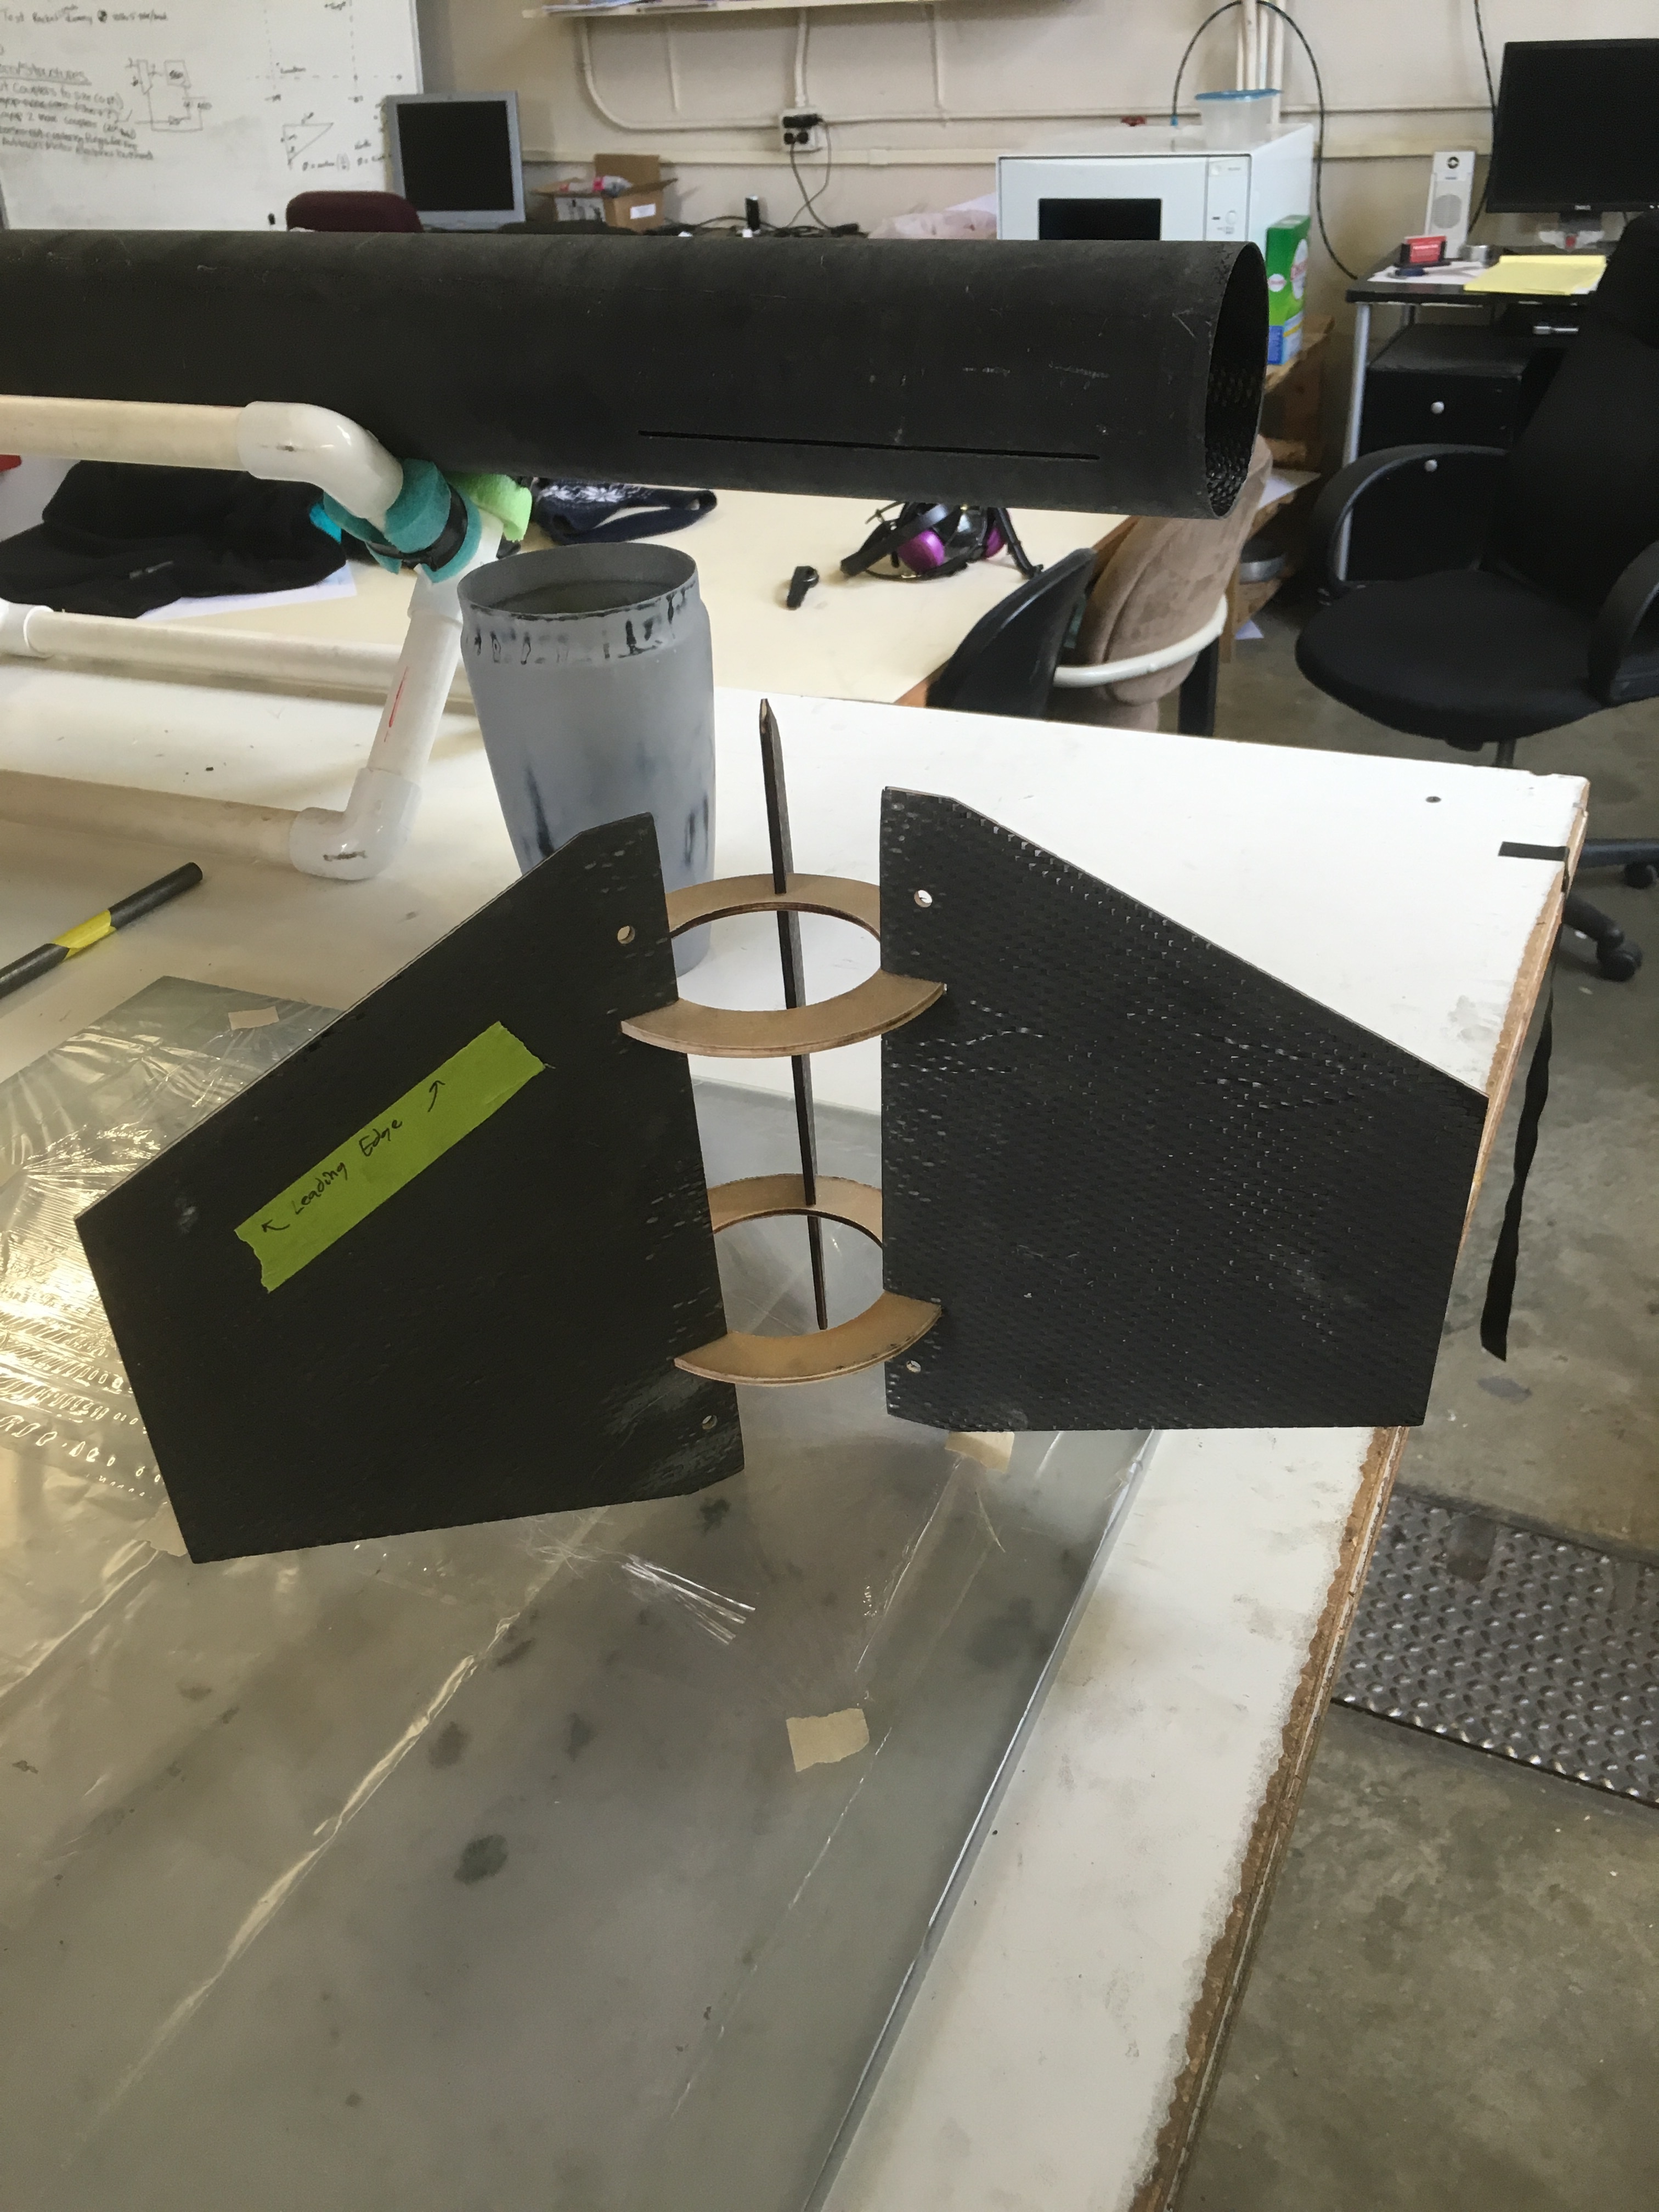
Based on this information, Oculus has decided to design and construct a triple hybrid system consist of hydrogen fuel cell, a LIPO battery and a super capacitor. This would allow the drone to become the electric rotorcraft with a triple hybrid power system (figure 1).

Figure 1. Block diagram of the power system

The development of a hybrid system can utilize the benefit of each system components to meet the load demand, however there is a wide range of configuration options for such endeavor. Figure 1 above show the configuration that Oculus has chosen for the alpha prototype.


Alpha Prototype Description

Oculus has developed a math model (figure 2) on Simulink to model a power flow of the power system and determine the suitability of the 1kV fuel cell for powering the drone. Oculus’s configuration has the fuel cell connects to a unidirectional DC/DC converter, and a bidirectional DC/DC converter for the supercapacitor, where all these power components are connected via a common DC link as seen in figure 1. This configuration allows using the supercapacitor as an energy storage system and SC will have an independent voltage from the entire system. Since SC will have a wide voltage range, it would allow better energy storage. Both the battery and the SC will help the power system to meet the short transient load chances to minimize the load variations on the fuel cell. The design is expected to increase the load efficiency and extend the lifespan of the fuel cell.

Figure 2. Simulink model of the power system

Unidirectional DC/DC converter:

Because the fuel cell has a much higher voltage than the battery, a buck converter (figure 3) design was chosen as a step-down unidirectional DC/DC converter. Buck converter is a class of switch mode power supply (SMPS) and could provide a very high-power efficiency (90%).

Figure 3 . Buck converter

An IGBT transistor was chosen as a switch for the circuit due to its ability to handle high current, and high lower power. When the switch is on, the power supply will connected to the inductor, the diode become an open circuit. The current flowing through the inductor has an equation (eq1)

Where ton is the time when the switch is on, T = ton + toff and D is the duty cycle as D = ton/T. When the switch is off, the voltage across the diode will drop to zero, the diode now shunts the connection between the inductor and ground. The current through the inductor decrease with equation 2

This lead to 2 possible operating mode of the buck converter: continuous and discontinuous mode

In the continuous mode (figure 4), when the circuit fall during the off state and rise during the on state. The output voltage can be calculated by using the equation

Figure 4. Continuous mode

By control the duty cycle, the reference output voltage can be easily producing with a PID control. However, during a discontinuous mode (figure 5), thing is a bit more complicated.

Figure 5. Discontinuous mode

During the discontinuous mode, it is quite common for a DC/DC converter to have its inductor current falls to zero. Inductor current will not persistent enough and will fall to zero before completing the cycle. When the peak inductor current become less than the DC component, the diode will turn on when the switch is off. However, if the peak of the inductor current is bigger than the DC component, the current will fall the zero while the diode is conducting. This will make the diode to stop conducting and the inductor current will remain zero until the switch is back on again. This condition often happens when the during light-load condition, such as moment before lift-off. The equation for Vout is shown in equation 4.


To control the frequency and duty cycle of the buck converter, Oculus has designed a simple PID control (figure 6 and 7). The PID will monitor the overall voltage across all three power components and automatic regulate the frequency to maintain and stable voltage level across the system, prevent damage to the fuel cell and the battery. The transfer function of the buck converter controller was calculated and used to assist the PID


1.2 Bidirectional DC/DC converter:

To improve the power efficiency of the drone’s power system, Oculus theorized that the addition of a supercapacitor in parallel with the lipo-battery would reduce the amount of power the motors drain from the battery. The main function of a capacitor is to store electrical energy and then when necessary, discharge the energy into to the circuit. A supercapacitor is a high-capacity capacitor, and therefore, stores roughly 10 to 100 times more energy per unit volume or mass than the typical electrolytic capacitors. The supercapacitor will accumulate the output energy from the lipo-battery and store it until the system communicates to the supercapacitor to discharge the energy.

To maintain the flow of energy being stored and discharged from the supercapacitor Oculus decided to create a buck-boost converter to act as a switch for the supercapacitor to the battery. A buck-boost converter is a bidirectional dc to dc converter. A bidirectional dc to dc converter allows the flow of power to go in both directions, which means the circuit can feed power to the load and the load can feed the power back to the source. In Oculus’ model, the source would be the lipo-battery and the supercapacitor and motors would be the loads.

The buck-boost converter consists of a MOSFET, an inductor, a diode, a capacitor and a resistor. MOSFETs are metal-oxide-semiconductor field-effect transistors whose voltage determines the conductivity of a device. The ability to change conductivity with the amount of applied voltage can be used to amplify or switch electronic signals. The inductor stores energy from the input supply and discharges energy to the capacitor. The diode is a blocking diode that prevents current from flowing into the right-hand side of the circuit, and therefore allows all current to flow through the inductor. The capacitor stores and discharges energy for the load of the circuit. The resistor represents the resistance of the load and receives energy from the capacitor when necessary.


On-state and Off-state

The principle operation of the buck-boost converter can be expressed using the two operating states of the converter. When the converter is in on-state, the input voltage source is directly connected to the inductor and starts to accumulate energy from the source. While the inductor is accumulating energy, the capacitor is discharging energy to the output load. When the converter is in the off-state, the inductor is connected to the output load and capacitor; and the energy is transferred from the inductor to capacitor and resistor. Figure () shows the on-state and off-state of the buck-boost converter.

Buck-boost converters consists of two different types of modes. The two modes are continuous conduction mode and discontinuous conduction mode.


Continuous Conduction Mode

In the continuous mode, the current through the inductor never goes to zero, and the inductor partially discharges earlier than the switching cycle. The current and voltage waveforms in an ideal buck-boost converter is shown in figure (). When the converter is in on-state, the switch is closed, and the rate of change in the inductor current can be explained with the equation 6.

The Vi represents the input voltage,  represents the change in the induction current and L represents the inductor.

At the end of the on-state, there is an increase in the induction current (IL). To determine the amount of change in induction current from the start of the on-state to the end, the equation 7 is used.


The D represents the duty cycle and the T represents a fraction of the time during which the switch is on. D ranges between 0 when the switch is off and 1 when the switch is on.

When the switch is open it is considered the off-state, and during this state, the inductor current flows through the load. To find the change in induction current for the output, one would need to assume zero voltage drop in the diode and have a large enough capacitor to keep the voltage constant, then the change in induction current can be represented by equation 8.

The variable Vo represents the output voltage of the circuit.

Determining the change in induction current is similar to the one used in the on-state equation. However, there is a variation in the duty cycle and the output voltage is used. The off-state equation for change in induction current is represented by equation 9.

We can see from equation 9, that the duty cycle is delayed in the off-state operation of the circuit. The gain of this model is represented by equation 10.

Discontinuous Conduction Mode

In the discontinuous mode, the current through the inductor goes to zero, and the inductor will completely discharge at the end of the switching cycles. Since the induction current is zero at the beginning of the cycle, it would be considered the maximum current, therefore, equation 11 represents the maximum current in the discontinuous mode.

During off-state, the load current (Io) is equal to the average diode current (ID). Therefore,

where  represents the negative input gain the buck-boost converter has on the duty cycle of the circuit. By replacing ILmax and    in equation 12 with equations 11 and 13, one could find the output voltage gain in the discontinuous mode by using simply algebra. Output voltage gain can be calculated using equation 14.

Compared to the continuous conduction mode, the output voltage gain for the discontinuous conduction mode is a little more complicated. The discontinuous operation depends on the duty cycle, the inductor value, the input voltage and the output current.


1.3 DC Motor Modeling

To modeling a DC motor. The rotor and shaft are assumed to be rigid. Here is the physical circuit of a DC motor.

Figure 8 . Physical circuit of a DC motor and its variables


In a DC motor, resistance value R and inductance value L are fixed. For both should be tiny. In DC motor circuit, the value of L can control the system response time. Large L has longer response time. Small L has smaller response time. For a 150W around DC motor, 0.01-Ohm resistor, and 1mH inductor has been considered. J = 0.01. K = 0.01. b = 0.1


Figure 9a. Simulink model of a DC motor


The blue part is physical model of DC motor, a rotational electromechanical converter is required, which converts electrical energy into mechanical energy in the form of rotational motion. The converter is described with two equations.

T is torque, V is voltage across the converter, I is the current across the converter, w is angular speed. And K is constant of proportionality. Furthermore, the dc motor has inertia and friction losses, an inertia and a rotational damper block. That all for DC motor, however we need to drive dc motor to rotate.

So, to control the DC motor, a voltage source is needed, which is power enough to maintain the specified voltage, and we serious connect a current sensor to measure current. Each physical network needs a solver configuration and negative voltage input need a ground reference. After DC motor block the electrical energy trans to rotational motion, ideal rotational motion sensor to measure the rotational speed of motor, and port named C is similar with electrical side “V-”, it’s a reference of rotational motion which need to connect to a mechanical rotational reference. The ideal rotational motion sensor is measuring the angular velocity in rad/s (W port), and angular displacement in rad (A port). Then, probe can monitor the motor action.


Figure 9b. Simulink model of a DC motor


Before that, physical signal must be converted to math signal. Which allow Simulink probe to connect. For a very basic drone structure, power connected to Electronic speed control (ESC), to maintain dynamic stable of the drone, ESC receives negative feedback speed signal and make the output speed signal stable in steady state region.


In Simulink torque and speed cannot to be plotted simultaneously, hence, another model needed to plot torque. Same as measuring angular speed. An ideal torque sensor needs to be connected, C port as a reference, T is torque in N*m.


Figure 9c. Simulink model of a DC motor

To find the output mechanical power, P = T*ω, where T is torque in N*m, and ω is angular velocity in rad/s.


Figure 9d. Simulink model of a DC motor


2. Design Modifications resulting from Alpha Prototype Activities

Oculus’ Alpha Prototype Activities presentation was December 7, 2018, and during the Q and A section of the presentation, a few design concerns and modifications were discussed between team Oculus, the client/mentor, faculty volunteer, professor and student peers. The main concerns that were addressed were the buck converter and supercapacitor circuits.


2.1 Buck Converter

The concern: Collin Merriman, faculty volunteer, brought up the concern for the buck converter and whether or not it was necessary to have the circuit in the design. Merriman mentioned that the motors could take the amount of voltage the fuel cell produces without the circuit, and that having the circuit results in a slight power loss in the overall power system.


Oculus’ response: The main reason Oculus chose a buck converter is to maintain a balance voltage between the fuel cell and the LIPO battery, and not the motor. While many motors could handle 45V input, a 6S LIPO battery won’t be able to handle this much voltage, and most likely will explode due to voltage imbalance. A buck converter allows Oculus to step down the voltage output of the fuel cell with very high efficiency, and also help amplify the current output of the fuel cell. Another reason for the buck converter was to in the efforts to protect the fuel cell from current feedback from the rest of the power system connections. When Oculus first received the H-1000 fuel cell, they thought that was the only fuel cell that they could work with, so a protection plan was implemented. The combination of the concern of the faculty volunteer and the response of the team, lead to the overall consensus that Oculus would look into some alternative ways of protecting the fuel cell from current feedback, but to also reduce the power loss that is created by the buck converter.


Modification: Due to limited amount of information, Oculus had made some assumption around the early design. In October, Oculus received news from Dr Leachman that Protonex and Amazon has agreed to loan 1 of their fuel cells to the team. Protonex currently has 2 fuel cells in production, Fcair1200 (1200W) and Fcair600 (600 W). Based on this information and the expected power requirement, It was a safe assumption that Oculus would receive the FCair1200. Since FCair1200 produces 45V and a 6S LIPO are rated at 25V, a buck converter is a necessary component.

One of the modification Oculus plans to do is to add another 6S LIPO in series together. This should allow the voltage to be balance between the system without using a buck converter. However a 6S LIPO battery weight roughly 1.2kg and any extra weight will require extra power.

But just recently, Dr Leachman and Oculus learned that protonex’s system includes 2 FCair600 in parallel. This piece of information is crucial for Oculus’s next design phase. The combination of 2 FCair600 together will produce a lower output voltage that might match the 6S LIPO while still maintain the power output of 1200W. This allows Oculus to replace the entire buck converter with just a simple diode. This configuration also allows the team to cut the weight of the entire system down. The Fcair1200 is weight at 4.0kg, while the FCair600 is only weight at 1.8kg. So even with 2 FCair600 together, it is still 400 gram less than a single FCair1200.  However this also run into another problem. Both version of the FCair fuel cell has the same hydrogen consumption rate at 63g/kWh. By having 2 fuel cells, and only one hydrogen tank available, this might cut the flight duration in half due to the flow rate of hydrogen is now doubling to supply enough hydrogen for both fuel cell.

Due to this information, Oculus is planning to setup a meeting with Dr Leachman, and Dr Merriman for further advice.


2.2 Supercapacitor

The concern: Colin Merriman mentioned that his team and him have tried using a supercapacitor in a power system before, and that it reduced the flight duration in the application of the drone. Merriman suggest finding an alternative for the supercapacitor circuit, or trying to find a way to make it more efficient. Merriman also had a concern in the method in which the battery, fuel cell and the supercapacitor are being switched on/off to alternate the source of the power system to match the necessary power requirements of the motors.

Oculus’ response: The main reason Oculus chose to involve a supercapacitor in the overall power system circuit, was to see if it will improve the efficiency of the power system. According to the Simulink simulation, the addition of the supercapacitor circuit improved the system by reducing the amount of current each motor absorbs from the source. Another benefit the supercapacitor provides is a fail safe for the power system. The supercapacitor acts as a rechargeable battery that can discharge energy at a fast rate for a very short amount of time. It can provide enough power to land the drone safely in the event of an emergency.

Modification: The supercapacitor circuit involves a buck-boost converter. The buck-boost acts as power switch between the supercapacitor and the rest of the power system. Oculus understands that there could be an issue with using a power switching method and using a supercapacitor. However, they plan to modify the converter to make it more efficient, using other topologies of the buck-boost converter. Oculus is considering using the flyback power converter. The flyback topology is that of a buck-boost converter, however, uses a transformer as the storage inductor. Second semester will involve further research on the advantages and disadvantages switching to a flyback converter, advantages and disadvantages of the switching method, and finding ways to make the power system more efficient in terms of desired output.

3. Discussion

Despite misidentify the scope of the project early on the of the development, the ideas found during the waterfall activities has proved itself to be suitable for the alpha prototype. The ideas of building a Simulink model of a triple hybrid power system between a fuel cell, a battery and a supercapacitor have proven to be effective in provide enough power for the drone, and increase the efficiency. By using the agile design concept of failing fast, Oculus has came up with a variety of concepts, and quickly found the most viable design (figure 3). The designs discussed during the design sprint were then evaluated using waterfall methods including a concept screening matrix to help the team choose the best concept.

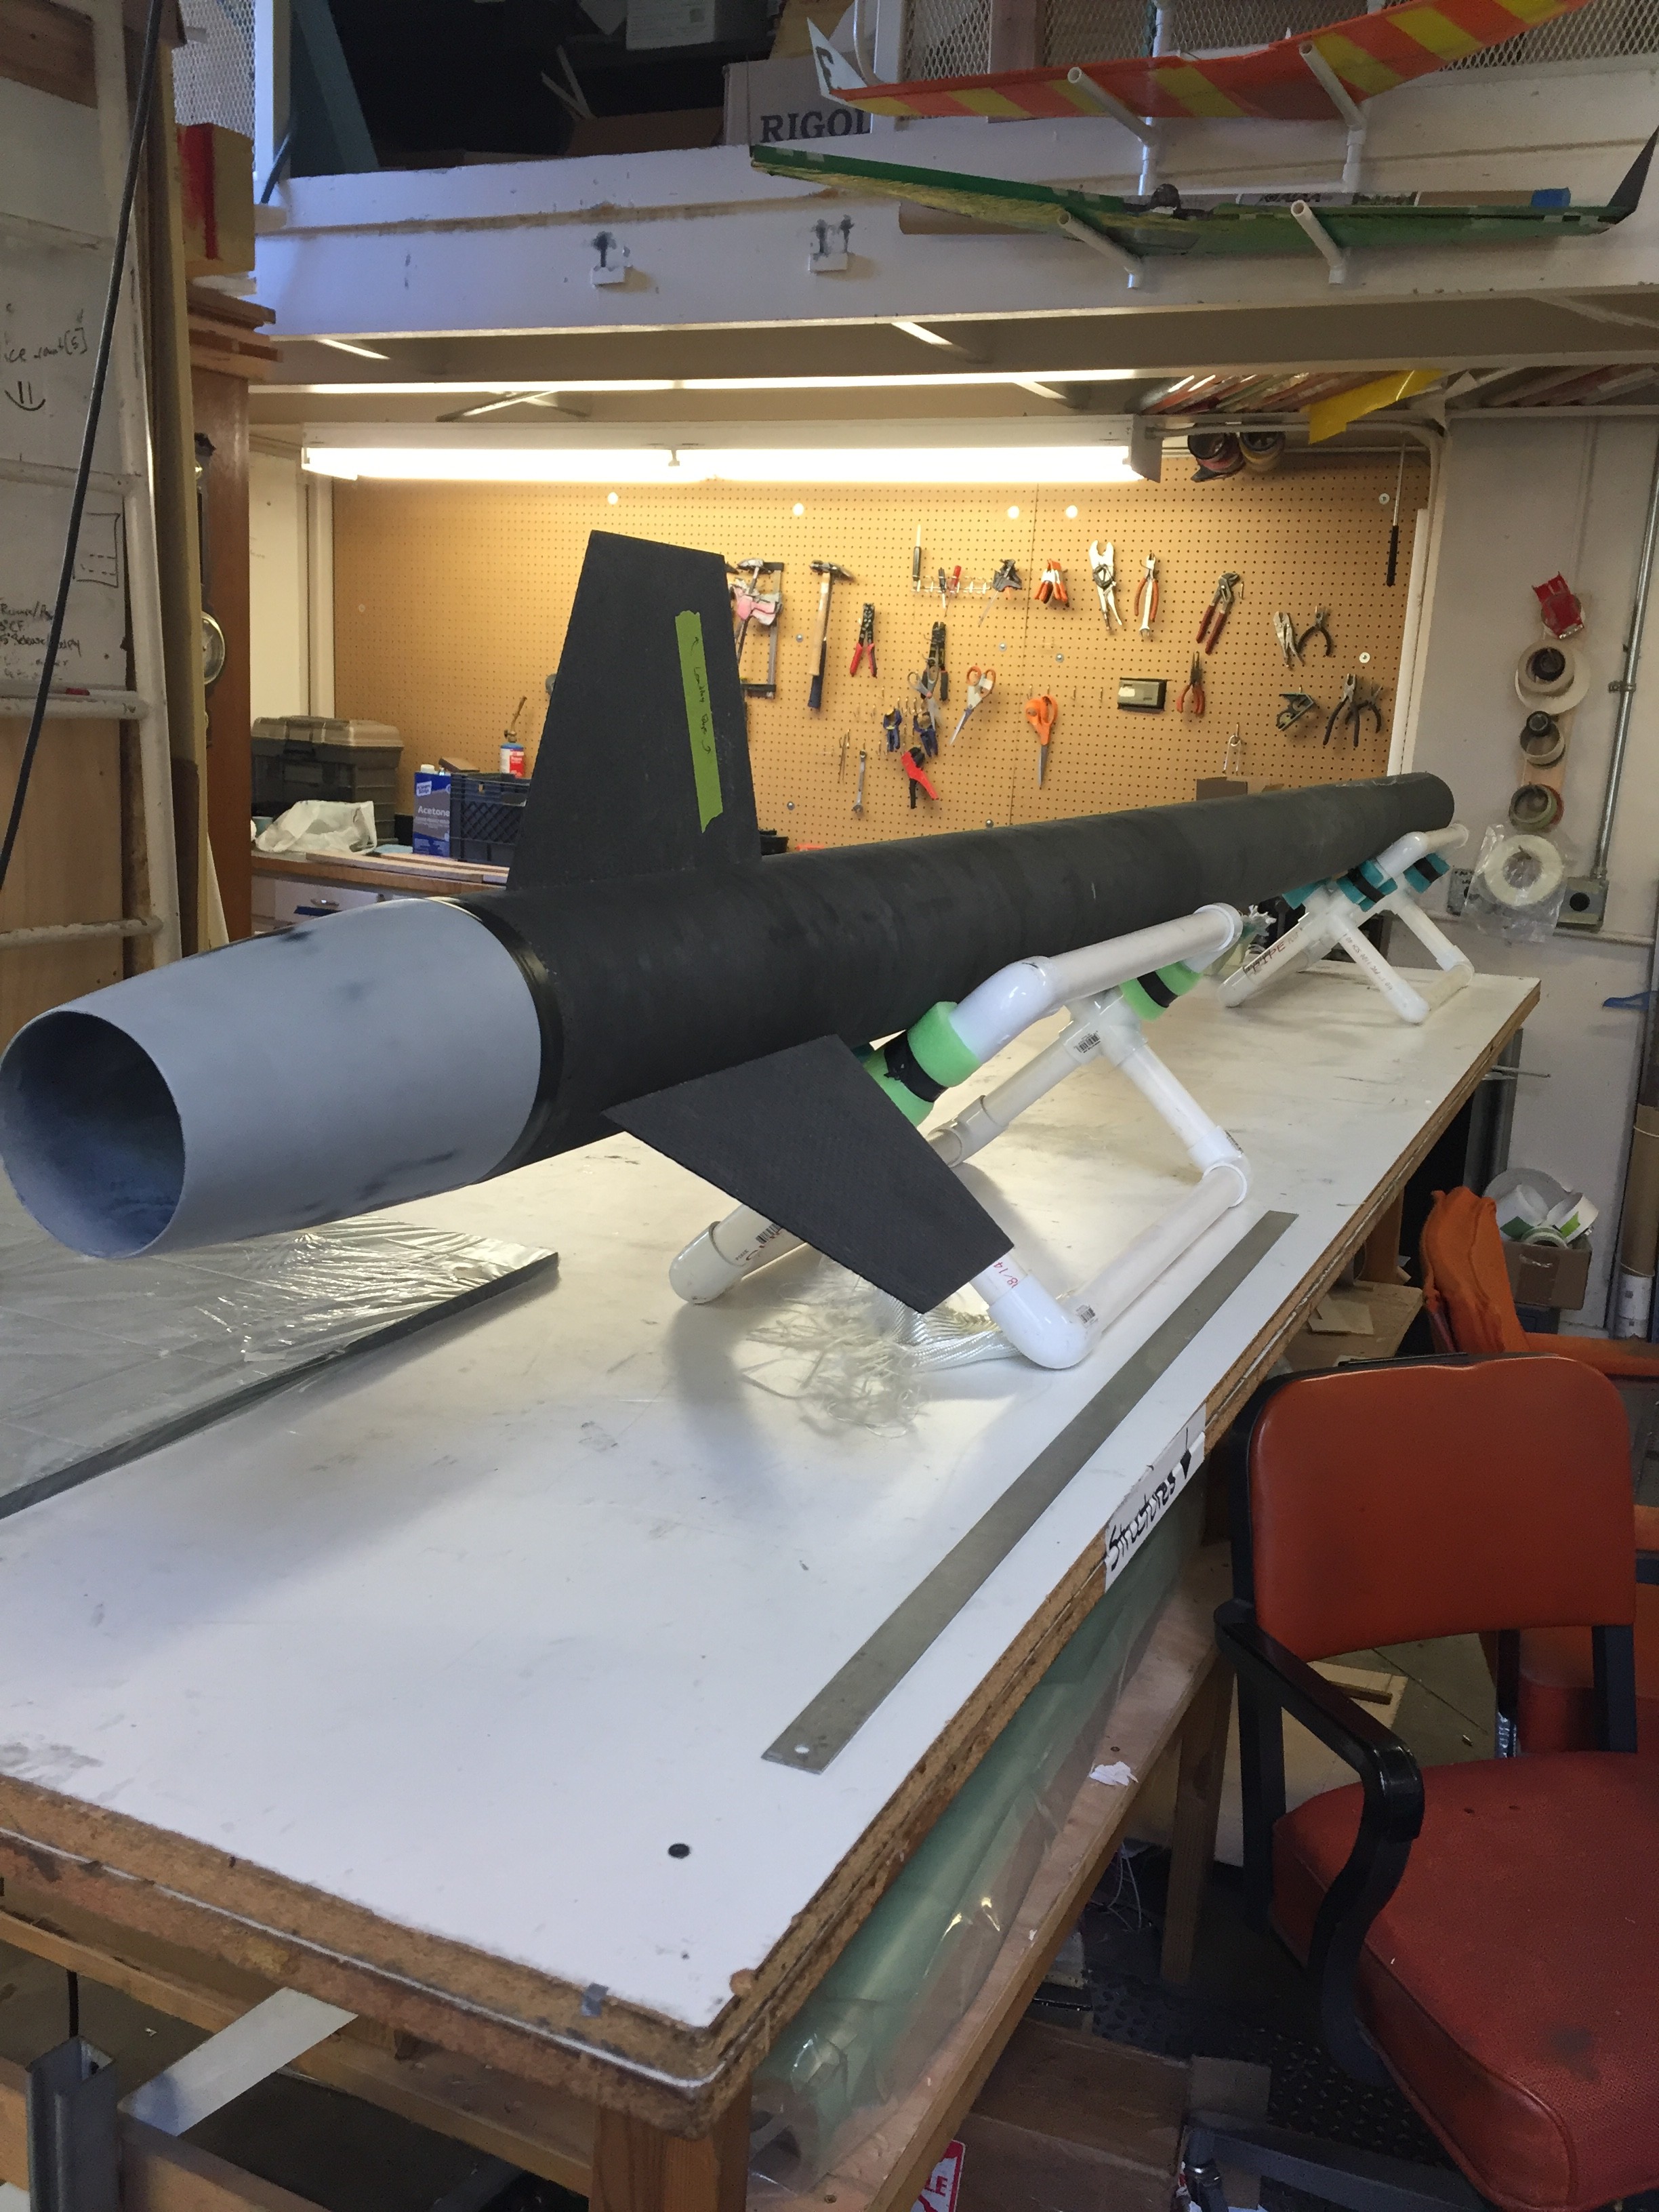
The alpha prototype shows that the team is currently on schedule despite early setback. However, there are still a lot of work to be done by team Oculus. By spring 2019, Oculus will need to focus on building a testbench, physical power system and integration with the drone frame.


4. Future Iterative Design Goals and Activities Planned for EE416

There are a lot of work still need to be done for next semester. After the demo on December 7, it is clearly shown that despite the math model of the power system will work, Oculus will face a lot of problem with the physical application. This forced the team to push up the time schedule for next spring, so that Oculus will have more time to work on the physical circuit.

Oculus is expected to finish the Simulink model by mid January. Other configuration will be test on the figure the viability. Over the winter break, Oculus will continue to work on developing a model for AC motor circuit and a DC/AC converter to support the AC motor. This would allows a more flexible model for the drone,. Oculus has also spending sometime talking to the FIZ, and the power lab for advice on a using a testbench. Due to high voltage and high current, Oculus will have to build an entirely new techbench that could handle the amount of power, currently the EECS school doesn’t have anything that could remotely withstand the amount of current.

Oculus will also be working together with Dr Merriman to figure out the best switching method for the power system.


Rocket and Associated Testing Infrastructure for Use in 2019 Spaceport America Cup Intercollegiate Competition


Washington State University Aerospace Club

Casey Adam Doan, Aerospace Club President

Noah Thompson, Rocket Team Lead

Bryson Jaipean, Rocket Team Vice-Lead


A preliminary design report submitted on January 18th, 2019

Executive Summary

The aerospace club was created to provide students at Washington State University opportunities to develop practical experience and promote collaboration in a multi-discipline engineering team.

The goal for this year is to design and launch a high-powered rocket carrying both an egg payload and a Doppler-effect based velocity measurement device to 10k ft this June as participants in Spaceport America Cup 2019. The project objectives include

  1. Design a centrifuge for large volume egg testing and a custom stability simulation based on MATLAB and SolidWorks.
  2. Create an egg-support structure with neutral buoyancy suspension of the egg aided by a 3D-printed, elastic mesh.
  3. Design and construct a rocket that could deliver both packages to a targeted altitude and safely recover it.


Background

Spaceport America Cup (previously IREC) is an international collegiate sounding rocket competition with over 100 participant teams from all over the world. With a significant scoring emphasis on team dynamics and engineering exhibition, this event serves as an excellent platform to empower and educate our club’s members. The caliber of technology produced for this competition increases every year. Last year, the club launched an L-class motor rocket carry a 3U CubeSat. Unfortunately, due to an unforeseeable circumstance, the custom navigation system on board failed and resulted in the loss of the rocket.

This year WSU Aerospace Club is pushing hard to transition into a more capable, competitive team. In order to achieve this objective, we are using this year’s rocket as a platform to introduce our members to more difficult testing techniques and facilitate the development of custom stability and trajectory simulations. Having learned from the failures of previous years, we are also taking advantage of a newly renewed enthusiasm for rocketry to strengthen our club’s structure and institutionalize the transfer of knowledge from one year to the next. In the following months, we will finalize the design of and begin construction on a high powered rocket for entry into Spaceport America Cup 2019. It will carry both a raw egg payload and a siren which will be used to measure velocity during boost using the Doppler effect.

In order to perform the high volume of testing necessary to properly design an egg support structure (and quantify egg strength), we are designing a centrifuge capable of spinning a 1kg payload up to 23g’s of centrifugal acceleration. Additionally, the Doppler payload requires that there be sound ventilation in the body of the rocket. These small additions, having been determined to invalidate commonly used rocket design platforms, pushes us to develop our own stability and trajectory simulation models.


Overarching Rocket Design Criteria

  • Basic criteria (imposed by competition):
    • Reach an altitude as close to 10k ft as possible
    • Carry at least 8.8lb of payload
    • Utilize a commercial propulsion system
  • Payload Based Criteria:
  • Minimize acceleration experienced (for egg structure)
  • Minimize design introduced probability of flight failure
  • Remain in Subsonic Flight (for doppler structure)
  • Minimize aerodynamic effect of strange external geometries
  • Maximize audibility of Doppler siren
  • Minimize Cost


Weight is, of course, always a consideration in rocketry. Because early designs use a surplus of propulsive power in conjunction with higher than usual weight to keep acceleration low, it is not listed with the other core requirements above. More specific rocket criteria were omitted here for the sake of redundancy, instead discussed in the design section of this report.


Centrifuge Design Criteria

The design criteria for our centrifuge testing apparatus are:

  • Safety
    • Apparatus must be of robust construction
    • Must fail safe where possible
    • Must be remotely controlled
    • Must be transportable (for testing away from populated areas)
    • Catastrophic Failure of Device must be contained or directed in some way.
    • Payload bay must be sealed to fluids, able to withstand sudden dislocation of weight.
  • Consistency & Repeatability of Applied Acceleration
    • Roughly equivalent acceleration must be applied to all points of payload
    • Multiple trials must have approximately same acceleration (repeatable application)
  • Power Supplied to Payload & Data Transmission
    • The payload must have some form of power supply to the payload bay to support measurement devices.
    • Resulting from the need to be remotely controlled, any data collected by the arm must also be stored onboard or transmitted to a ground station at remote control location.
  • Versatility
    • To maximize the value of this expenditure to the club, we would want to design this device in such a way that other payloads could be tested with it.
  • As Always, Minimum Expense Meeting Other Requirements


Current Status of Project 

1/ Overall Design

Though specific external dimensions of the rocket itself are in flux, pending the completion of all internal structures, the approximate length of the rocket will be 100in. The layout of the rocket will be, from fore to aft: nose, drogue parachute, ejection coupler, main parachute, rigid coupler, egg payload bay, electronics bay, Doppler speaker, Doppler vent support structure, motor, tail.

Figure 1. An approximate model of Rocket, made in OpenRocket

We have selected, based on previous experience, the following ejection sequence:

  • E-bay triggers drogue ejection, which is primarily driven by the momentum of separating sections (as opposed to the force from ejection charge detonation).
    • The aft drogue shock cord will be connected to the lower section by an eye-bolt anchored between the coupler charge wells in a 0.5” bulkhead. The fore drogue shock cord will be attached to the coupler section by an eye-bolt anchored between the charge wells.
    • At this point the wiring through the main shock cord has not held an applied load, so risk of flight critical failure of those wires are relatively low. They only need to maintain contact until drogue deployment, after which failure has no effect on flight or data collection.
  • E-bay triggers the main ejection
    • Wiring failure here after ejection does not affect flight performance.


2/ Points of Concern

Main Parachute Connection:

The main chute connection was an immediate point of concern when considering this layout. Usually, the heavier lower section of the rocket is attached to the main chute by a bolt directly into the motor casing forward closure. To ensure that a coupler might be a sufficient replacement for normal attachment, a baseline static study was performed:

Historically, we have used plywood as bulkhead material where possible to save cost. Our preliminary model reflects this design choice. The material applied here is a custom defined generic plywood, with material properties in a direction normal to the surface. This cannot be assumed to give conclusive or accurate numerical values for stresses, but sufficiently functions as an early verification.

Figure 2. Setup & Materials for bulkhead static study.


The coupler end itself is made of ¼ inch plywood, with a lip cut around the edge (making lip thickness of 1/8th inch).

Threaded rods will insert through coupler, with external bolts on either side bracing against the force of ejection. The closures themselves are also epoxied to the outer edge of the coupler tube. The results of a quick simulation are shown below. The surfaces where bolts on threaded rods make contact are fixed, and the edges which will be epoxied are fixed. This fixture on the threaded rods is not completely accurate, as some translation will be allowed before failure. Because of the direction of applied force, this should still serve as a passable approximation. Curvature based mesh with mesh control around applied load and fixtures is used


Figure 3. Static study results

As the results to the in Figure 3 illustrate, all parts of the closure except for the concentrations of stress around sharp edges exhibit less than 24 MPa of Von Mises stress, which should be below the tensile strength for most plywood[1] normal to plane. This is with 247 lbs applied to the surface under the rear eye-bolt fixture. At 15k ft above sea level, density of air is 14.96×10^-4 slugs/cf.

Assuming a drogue coefficient of drag of 1.34 (typical main chute drag) and a solid diameter of 4 ft, the force exerted by the chute instantaneously at 140ft/s can be estimated by:

Therefore, for preliminary projected apogee speeds, the use of ¼” plywood as a chute contact should be sufficient. Since it is near failure at stress concentrations, a thicker bulkhead with composite reinforcement will likely be used and verified during design finalization.


Doppler Payload Acoustic Vents:

Perhaps the component over our design which commands the most attention is our Doppler acoustic venting section. Sandwiched between the motor and the rest of the rocket, cutting holes in a section which is usually incredibly load bearing reduces the overall strength of the rocket dramatically.

By comparing the CFD produced coefficients of drag at variable velocities for identical rockets with and without the vent structure, we determined that by adding the structure we significantly increased drag as well. We used a one-dimensional trajectory program in MATLAB (taking SolidWorks data as input) written by the previous rocket lead, Sean Journot, to verify that 10k feet were still attainable with the addition of such significant drag. The base equations for this code are simply one-dimensional kinematics equations, substituting values on each iteration for differing atmospheric conditions. Sample code is included in Appendix 1.

To allow for these holes to be cut, we are designing an internal support structure to bear the load of that section. It will be fixed rigidly to the body tube below, between, and above the holes. The internal structure forms a parabolic nosecone shape at its core, being tangent to the body tube at vent exit. The structure is being designed to support both thrust and aerodynamic forces in entirety with a safety factor of four. Our own version of this MATLAB simulation is currently being developed, adding a degree of rotational freedom and horizontal translation. When completed, though very computationally expensive, this simulation should be able to more accurately predict stability and trajectory of any ballistic projectile modellable in SolidWorks.

Figure 4 . Lower section of rocket

3/ Centrifuge Design

The decision to attempt to use a centrifuge for egg testing supplements the usual method of launching test rockets. When considering whether to proceed with designing the proposed centrifuge, the following qualitative comparisons were made.


Table 1. Qualitative comparison of test rockets and centrifuge

Test Rocket Pros Test Rocket Cons
·         Less Expensive Upfront

·         Can apply large accelerations for short periods of time

·         Easier to develop and gain approval

·         Easy to balance

·         Testing opportunities are infrequent

·         Has per launch cost that is quite high (motors are guaranteed expense)

·         High risk of rocket failure or loss during testing

·         Applied acceleration cannot be easily fine-tuned

·         Variation between trials would be larger (dependent on more factors)


Centrifuge Pros Centrifuge Cons
·         Very low operating cost

·         Ability to test on a continuous basis

·         Lower risk of device failure or loss (money spent is a greater investment)

·         Opens door to physical acceleration testing of any small structural device

·         Very high consistency of applied acceleration

·         Need to Develop Safety Protocols and Obtain Approval

·         Higher upfront cost

·         Will require proper balancing

·         Will not likely be able to apply large accelerations for short periods of time.


Because of the egg payload, we benefit greatly from the ability to test a large number of eggs with varying structures in different orientations. We plan to examine the responses of different farming methods, weights, sizes, and orientations of eggs under a consistent acceleration to determine those most suitable for launch. Because eggs are so fragile, we also would benefit from the ability to test each possible egg support structure multiple times. We plan to produce a probability distribution of egg failure for each structure considered. The ability to have such a test and revision process, in addition to the return on value in following years with its lower operating cost, leads us to favor the construction of a centrifuge over increasing our use of test rockets.Figure 6. Centrifuge Illustration (not to scale)

The centrifuge arm is selected to be 13 inches in radius. In selection, we wanted a relatively low kinetic energy (easier to contain failure), and relatively low error of applied acceleration (difference in centripetal acceleration over payload). Taking the payload to be 3” in length along the axis of the arm and 25 g’s as the maximum desirable average applied acceleration, the percent error of applied acceleration (using 25g’s as base) can be plotted as a function of centrifuge arm radius. This relationship was used to pick an optimal radius, just below 10% error (deemed an acceptable threshold). Its simple derivation is included in Appendix 2. The remaining centrifuge components are still being modeled but will be completed by mid-February.

The main shaft of the centrifuge will be supported by a thrust bearing and a machine bearing. It will be threaded at the base, with a nut attached during assembly to prevent the shaft from lifting. The arm itself is currently intended to be carbon fiber (its lightweight deemed more beneficial to risk minimization than a more robust but heavier arm). A brushed DC motor will be used to power the shaft, connected by a chain drive.


Centrifuge Electronics

The centrifuge will be controlled by a custom microcontroller with onboard MPU- 6050 accelerometer sensor and strain gauges. The controller will store data on micro SD card as well as relay real-time stream of data to nearby electronic devices via a Wi-Fi access point. The centrifuge will also be equipped with a safety feature to analyze and detect any odd behaviors, and immediately shut down the centrifuge.

An application to control the centrifuge is also in an early stage of development to help multiple electronic devices to establish a 2 ways communication with the centrifuge. The apps will allows the device to obtain data from the centrifuge, and have full control of the centrifuge. User will be able to change centrifuge rotational velocity, turn on and shutdown the machine from a safe distance.  Currently the centrifuge could transmit data to a mobile device with a range up to 200ft. This allows users to establish a safety radius of operation


4/ Gantt Chart


Great Team, Great Year

Club Photo (5)

It has been a great year for the WSU Aerospace Club. We have excelled in innovations, attempted new challenges, and grown even larger. This is the second year the club will be attending IREC and the WSU Aerospace Club has shown true dedication and excitement for the event. We have researched, manufactured, and tested our own propellant, which is no small task. We have created a parachute system that not only is designed and hand made, but also autonomously guided by GPS coordinates. We have created a 34″ wingspan glider that fits into a 4.5″ body tube and will autonomously glide back to the launch site with GPS coordinates. We have created a new electronic system with an upgraded arming mechanism and we have built an all carbon fiber fuselage with a stunning paint scheme.

All of this is possible due to the hard work that each of the club members put in for the past 8 months. It takes exceptional students to come in every Friday and work hard after a full week of school. This year is truly one for the books and I hope all of the members are proud of their accomplishments.

Ladies and Gentlemen, this is what makes clubs so exciting and impressive. Never stop improving and encouraging each other to conquer new challenges. You can do it!

13063139_10206628880261715_1167717231064625356_o

Crimson Fire: New Launch Date

After weeks of hard work and even more so this week, the Crimson Fire is nearly finished. Many members didn’t sleep for literally days and even though the team worked diligently to try and get the rocket ready for a flight today, we ultimately decided to wait to launch. Tests on the ejection system in addition to a couple other parts will be very beneficial for the rocket before its first flight. After all, sometimes you only get one shot with a rocket and we want to make sure that we have done everything that we can to make it safe and reliable for its maiden flight. We will make May 27th our new launch date in Mansfield at the “Fire in the Sky” event. Here are a couple photos from this morning of our rocket compared to last years, and the spectacular fin paint scheme designed by Jon Farrell.

IMG_20160423_081524 IMG_20160423_081718 IMG_20160423_082322

Meet the Crimson Fire Rocket!!!

Rocket all together!

WSU Aerospace club has been working tirelessly to get the rocket fully assembled so that the components that go into the rocket can start to be put in.Our rocket this year is 12.2 feet tall! which is almost twice the size of last year’s rocket the Carbon Cougar which was 6.5 feet tall. We have our first test launch in Mansfield, WA on April 23rd (weather depending) we hope that we can get one successful launch in before competition! We are so excited to compete in the IREC competition in Green River, Utah on June 15th! Go Cougs!

Aerodynamics/Structures Update

Aerodynamics/Structures has been doing great! Since we have figured out how to manufacture tubes with no wrinkles, we have been able to make our three body tubes.

image
Member Katlyn Struxness (5’3″) next to the bottom section of the rocket that was taken out of the oven
image
First body tube layup! This tube is one of the two 35″ tubes for the upper section of the rocket!


There are only two separation points on the rocket, which is at the nose cone and then between the upper section and lower section. We had to layup 3 tubes because the upper section is 70 inches long and wouldn’t fit in the oven to cure. What we are doing to alleviate this issue is to have a coupler that will be permanent to join the two 35 inch sections to make the full upper body section. With the couplers made the week before spring break, last weekend we were able to put all three sections of the rocket together!

All Three sections together standing in the WSU Aerospace Club room

As you can see, this is a pretty tall rocket, and this is without our nosecone and boat tail. The final height of the rocket will be 12.1 feet tall! This is a huge difference from our 2015 rocket which was 7 feet tall with a 4 inch outer diameter. With a bigger rocket we have more opportunities to be creative with our payload and recovery system (more on those components later!). We also have made half of a nosecone and will be using a joggle to join the two halves together; a joggle is like an insert for the inside of the nosecone. It will be offset on the inside of the nosecone and will be used as a guide to join the two halves together. Since the boat tail and fins have been made we really wanted to see them on the rocket so we have attached them. There are centering rings that insert into the fins from the inside of the body tube which reinforces the strength of the fins as well as holds the motor in place.

Slack for iOS Upload (1)
Fins with the centering rings
image
All body tubes, fins and boat tail assembled!

       image

The next steps for Aerodynamics/Structures are to epoxy in the coupler for the upper section, put bulkheads in the rocket (pictures to come for the bulkheads), and finish the nosecone.